Numbers User Guide
Set up a Number
Setting up a 10-digit number means doing two things:
- Specifying which application account will send outgoing messages from the number. The main use of the application account is authentication. Depending on how your company has chosen to utilize application accounts, you may have just one or you may have several. The setup tool lets you choose an existing account, or you can create a new one.
- Specifying how you want our system to handle incoming messages. Incoming messages are also referred to as MO (mobile originated) messages. They are the messages texted in by your end users.
Accessing the number setup tool
When you purchase a new number, Numbers automatically takes you to the 10DLC setup wizard. It takes you through all the steps required for 10DLC, including the number setup step.
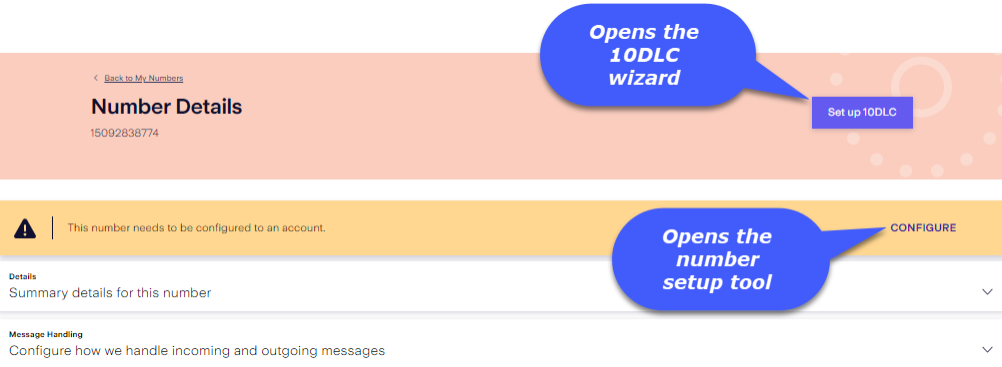
You can also access the setup tool independent of the purchase process by clicking the number from the main page and viewing the Number Details page. There, as shown in the following screen shot, you can click Set up 10DLC to open the wizard or click CONFIGURE to access just the number setup page. And, if you ever want to add an already configured number to another application account, you can do that from the Number Details page simply by clicking the Message Handling accordion. It will open and give you the option to add the number to another account.
Numbers requires you to associate each number with a campaign before you can assign it to an application account and set up message handling. If you haven't specified which campaign is using a number, then the Number Details page will indicate that the number needs to be configured for a campaign. In this case it will display an ADD TO NEW CAMPAIGN button instead of a CONFIGURE button.
Here are some rules to keep in mind:
- You can associate a 10DLC originator with one active campaign at a time.
- You can associate a campaign with multiple 10DLC originators.
- You can only reassign a number from a campaign that is deprecated.
- You can configure a number for both SMS and MMS handling.
Filling out the setup form
The setup form looks like this:

Specify which channel(s) to use
Use the SMS and MMS switches to enable the channel you want to use. You can use both for one number. The page will display settings depending on your choice.
Important: The MMS feature is in beta, so if the MMS toggle switch is disabled, contact your account manager to gain permission to the feature.
Specify how you want to send messages
Use the Which Account Id Will Use this Number? drop-down to select an account, or select New if you need to create a new account.
Select the number(s) that will send messages using this Account ID
The number you originally selected will be checked in the table, but you can select additional numbers if you want to.
Specify format and the endpoint for MMS delivery receipts
Choose between the MM7 or JSON format and provide a URL Numbers can use for MMS delivery receipts.
Specify how you want to receive messages
- Select how you want e to receive incoming (MO) messages. Your options are:
SMS MMS v4 HTTP (JSON or XML)
SMPP
v3 HTTP (XML only)
MM7
JSON
- Enter the endpoint we should use to forward incoming messages to your system.
- Tell us whether the endpoint requires authentication, and if it does then provide us the password.
- Tell us whether all incoming messages should go to the endpoint or whether only those using a specific keyword should. If you select No then provide the keyword.
Review and submit
When you're finished, click Review & Submit. You'll see a Review pop-up where you can review the setup and go back if you need to change anything. Otherwise, click Submit. Your number will be listed under My Numbers where you can view your setup and configure further details, if needed.